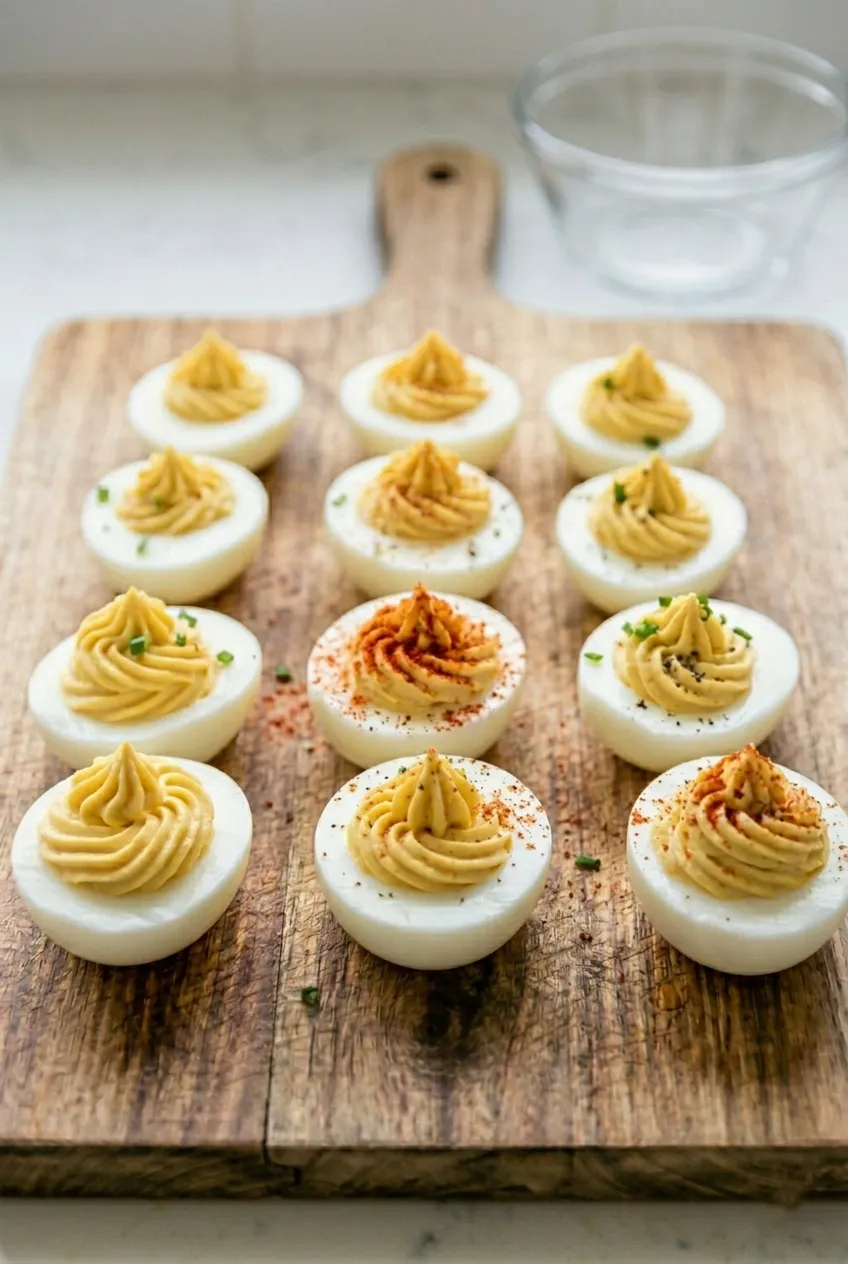
Quick and Delicious Deviled Eggs Recipe (Easy, Creamy & Totally Snackable)
We’re making some quick and delicious deviled eggs… yes, deviled eggs, not “eviled” eggs. And trust me, these are the kind of little bites that disappear faster than you can say “save me one.”
This recipe is simple, fun, and super satisfying. If you can boil eggs and mash things with a fork, you’re already winning. Let’s get started.
Why You’ll Love This Recipe
Deviled eggs are one of those magical foods that feel fancy but are secretly very easy. They’re creamy, a little tangy, slightly spicy, and just so good.
- Perfect for picnics, parties, or just a snack
- Easy ingredients you probably already have
- Ready in under 30 minutes
- Totally customizable
Also, fun fact: Deviled eggs go way back to ancient Rome. Back then, they ate boiled eggs with spices. The word “deviled” just meant making food spicy and rich. And honestly? That still checks out.
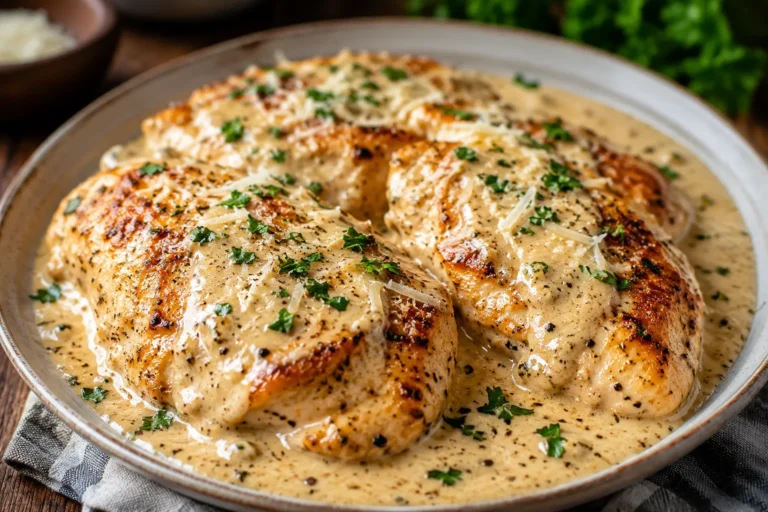
If you’re planning a cozy spread, pair these with a bowl of white chicken chili for a warm and satisfying combo.
Ingredients You’ll Need
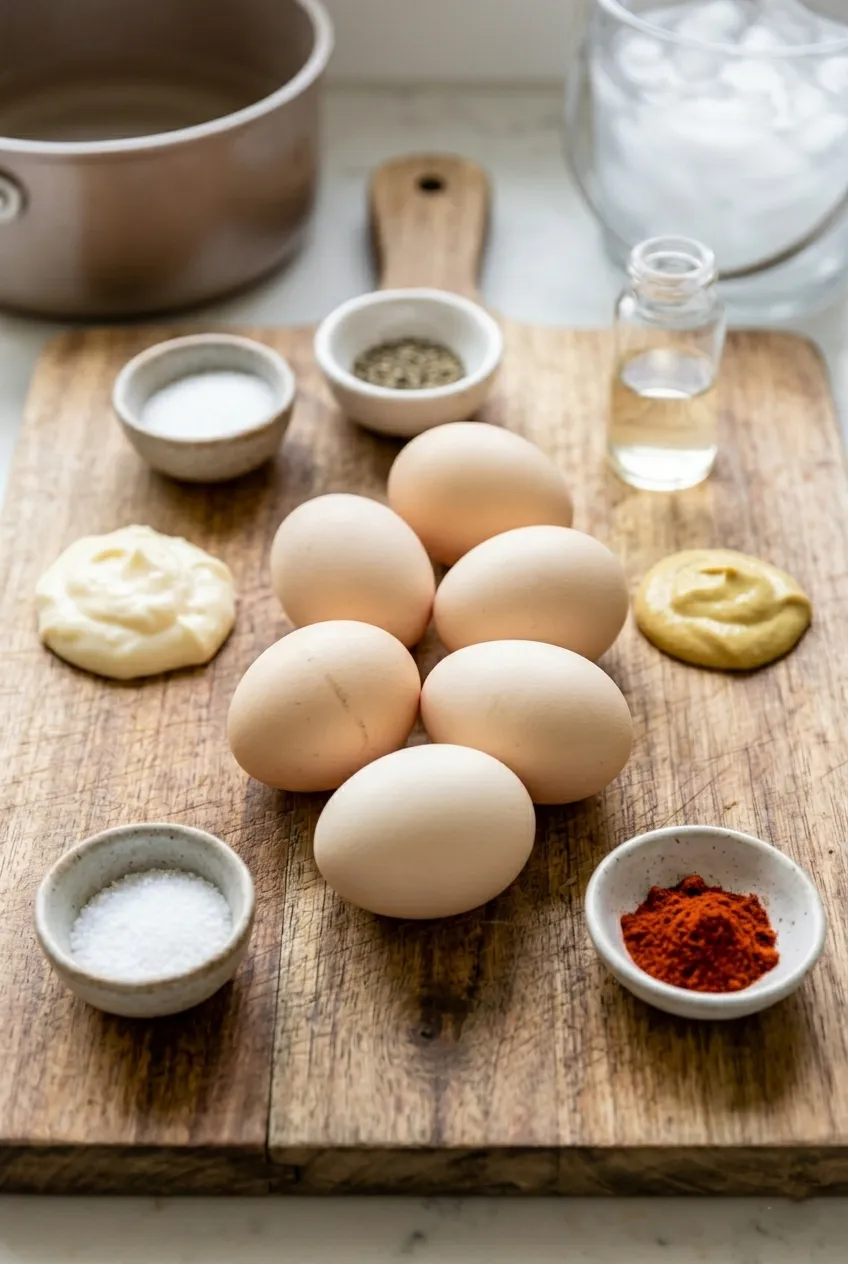
Here’s everything you need to make these creamy little bites:
- 6 eggs (older eggs work best)
- 2 teaspoons salt
- 2 teaspoons vinegar (for boiling)
- Water (enough to cover eggs)
For the filling:
- 3 tablespoons mayonnaise
- 1½ teaspoons Dijon mustard
- 1 teaspoon white vinegar
- Salt (to taste)
- Black pepper (to taste)
For garnish:
- Paprika
- Extra pepper (optional)
Step 1: Boil the Eggs (The Right Way)
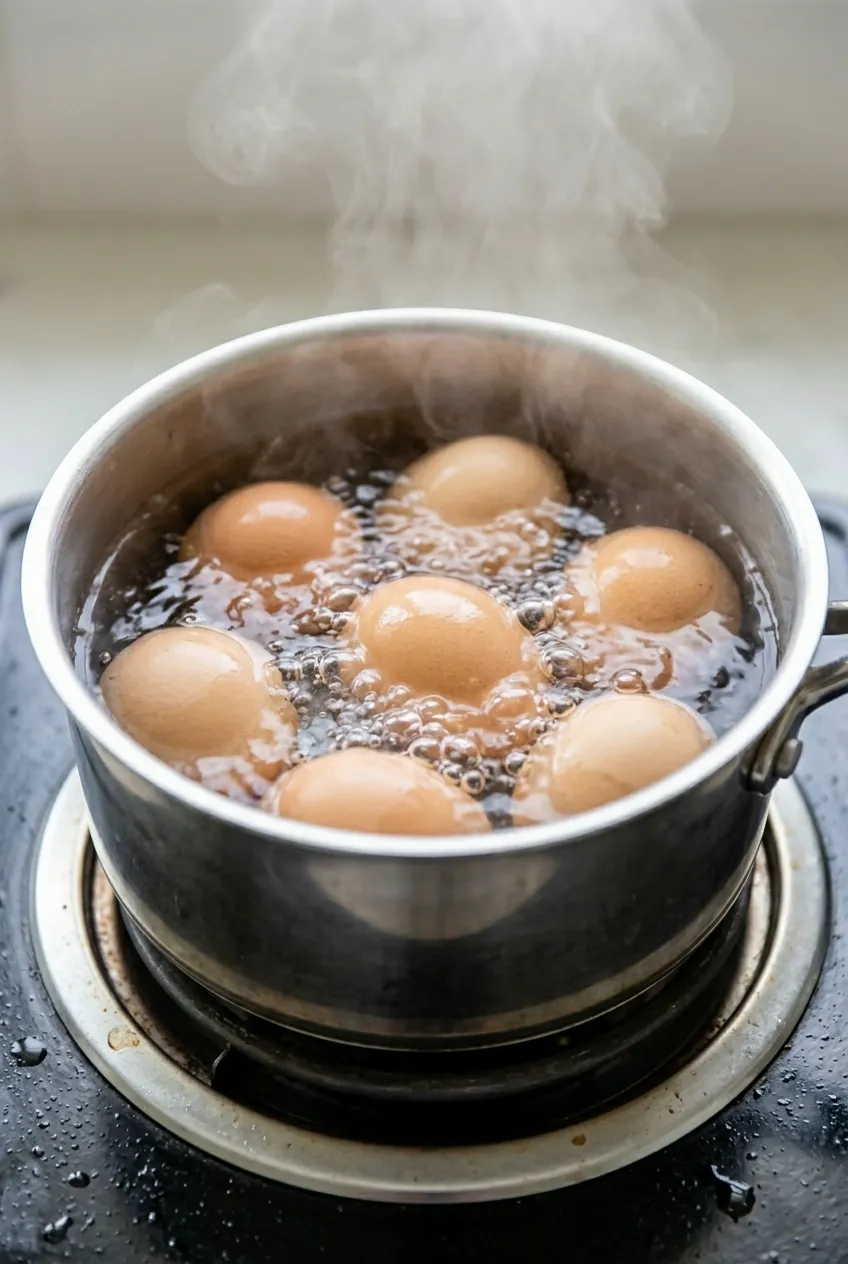
First off, grab six eggs. But not just any eggs. You want the older eggs sitting in the back of your fridge. Fresh eggs are horrible to peel. They will give you nightmares. So in this case, older is better.
Place your eggs carefully into a medium pot.
Add:
- 2 teaspoons of salt
- 2 teaspoons of vinegar
Now fill the pot with water until the eggs are covered by about 1 to 2 inches. Cold water is totally fine here.
Place the pot on medium-high heat and bring it to a boil.
Once the water starts boiling, set a timer for 7 minutes. Not 8. Not 10. Just 7.
Why? Because overboiled eggs are not cool. The yolks become rubbery and can turn gray. That means your filling won’t be smooth and pretty. You want that nice orangey-yellow color.
Step 2: Ice Bath Magic
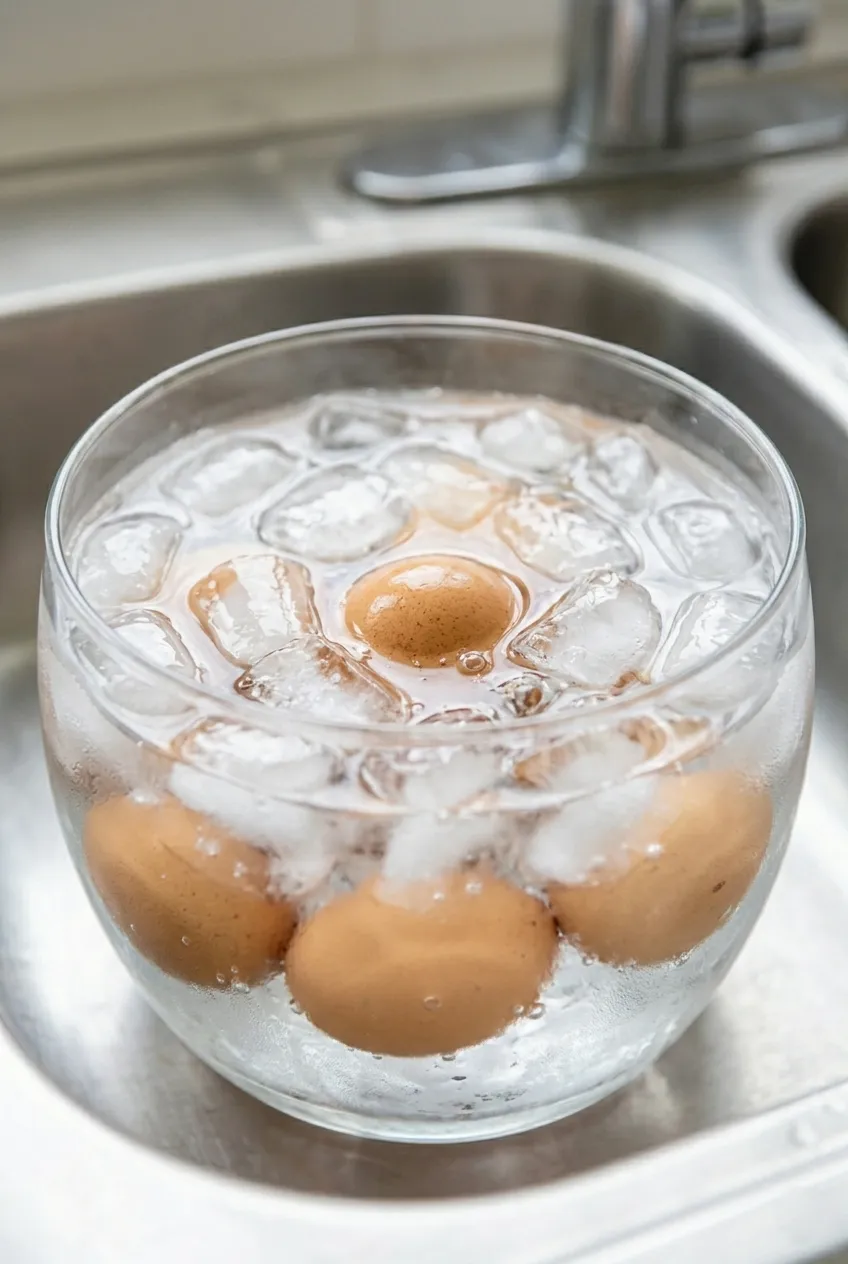
As soon as your timer goes off, take the eggs and put them straight into an ice bath.
This does two important things:
- Stops the cooking
- Helps the shell come off easily
Let the eggs chill in the ice bath for about 10 minutes so they cool completely.
Step 3: Peel the Eggs (Think Good Thoughts)
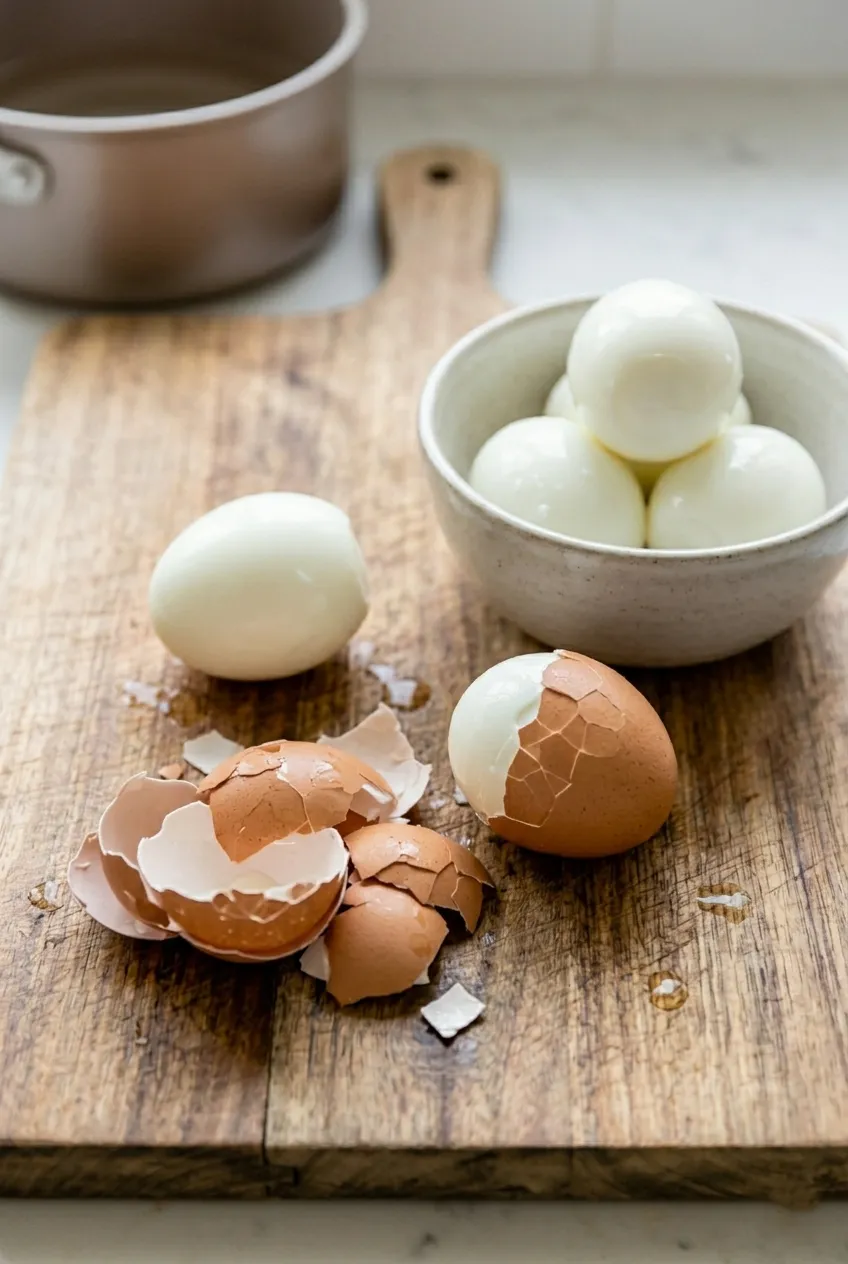
Now it’s peeling time.
If everything went right, these eggs should peel easily. And honestly, it feels like magic when they do.
If you see tiny shell pieces stuck to the egg, just dip it back into water and give it a little shake. The shells will slide right off.
One thing to watch out for: sometimes you peel the shell but not the thin membrane underneath. That sneaky layer can ruin your smooth egg surface. It keeps the egg safe, sure… but it’s not delicious.
Need another quick comfort dish? This easy taco soup is perfect for busy weeknights.
Step 4: Slice and Separate
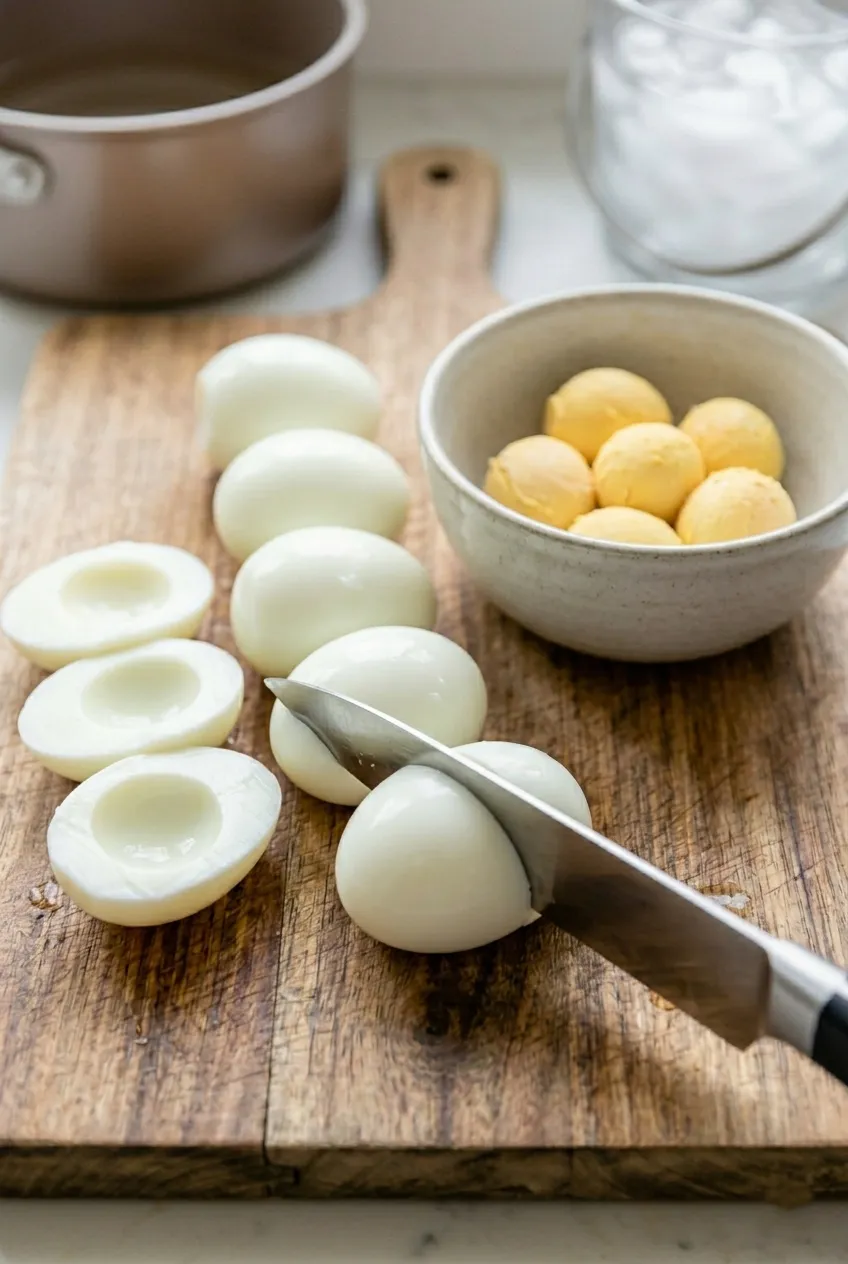
Once all your eggs are peeled, carefully cut them in half lengthwise.
Take out the yolks and place them in a bowl. Keep the egg whites aside on a plate.
Look at those yolks… perfectly cooked, no gray, just beautiful.
Step 5: Make the Creamy Filling
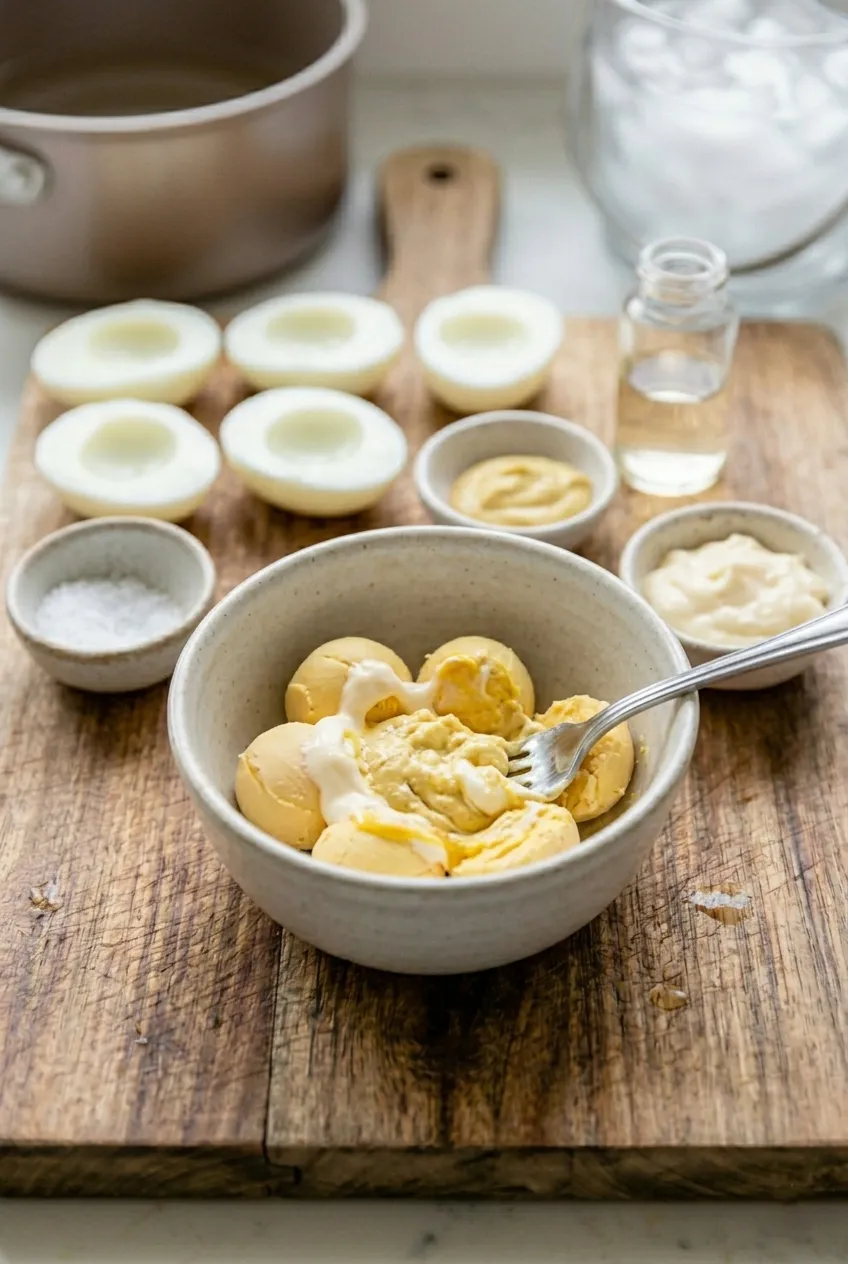
Now the fun part.
To your bowl of egg yolks, add:
- 3 tablespoons mayonnaise
- 1½ teaspoons Dijon mustard
- 1 teaspoon white vinegar
Mash everything together with a fork.
The mayonnaise makes it creamy and rich. If you don’t like mayo, that’s tough… it really belongs here. But if you absolutely must swap it, sour cream can work.
The mustard brings the spice. The vinegar adds a little tangy kick.
Mix until smooth.
Step 6: Make It Your Own (Optional Fun)
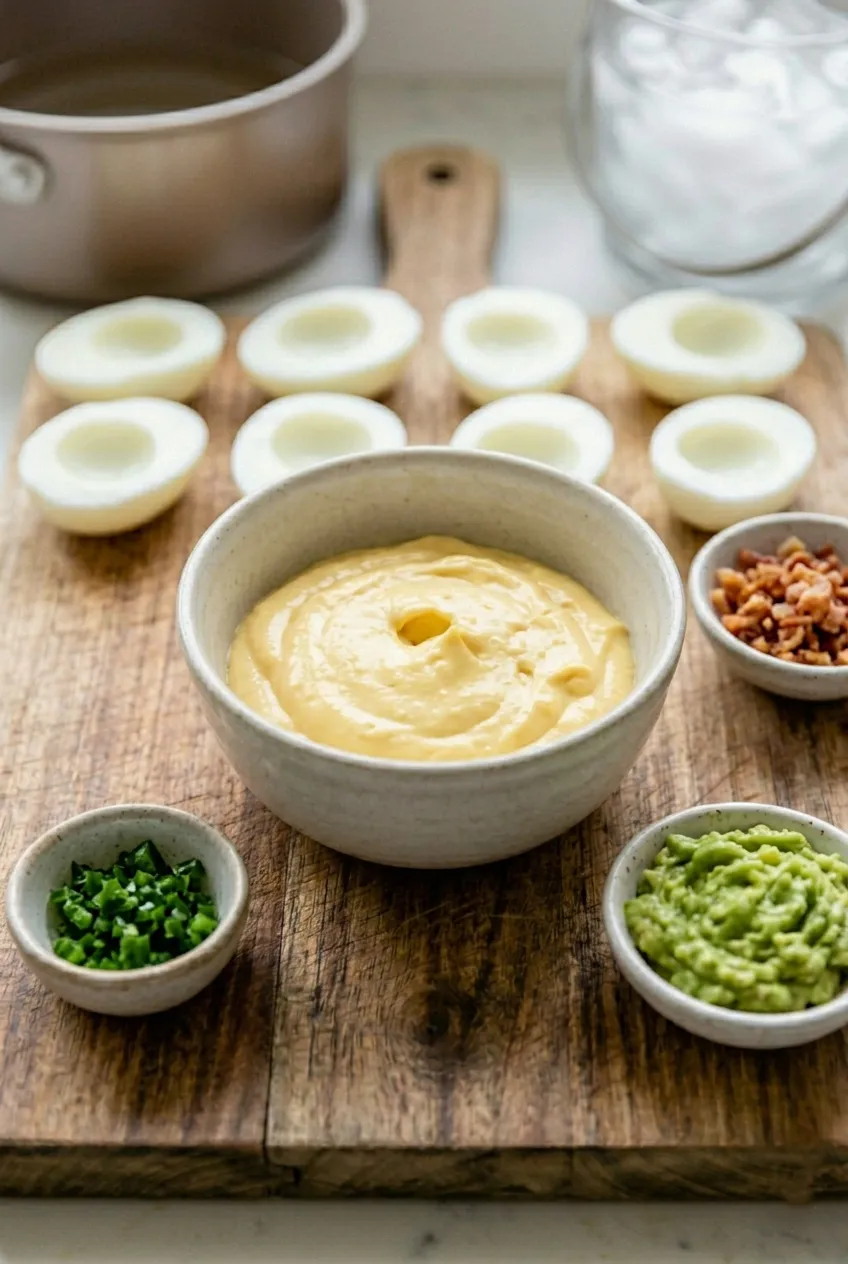
This is your base recipe, but you can totally play around with it.
Want to level things up? Try adding:
- A few drops of truffle oil
- Smoked paprika
- Chili flakes
- Tiny jalapeño pieces
- Crumbled bacon
- A bit of mashed avocado
If you’re adding chunky things, it’s better to sprinkle them on top instead of mixing them in, especially if you want a smooth filling.
Step 7: Smooth It Out (Optional but Fancy)
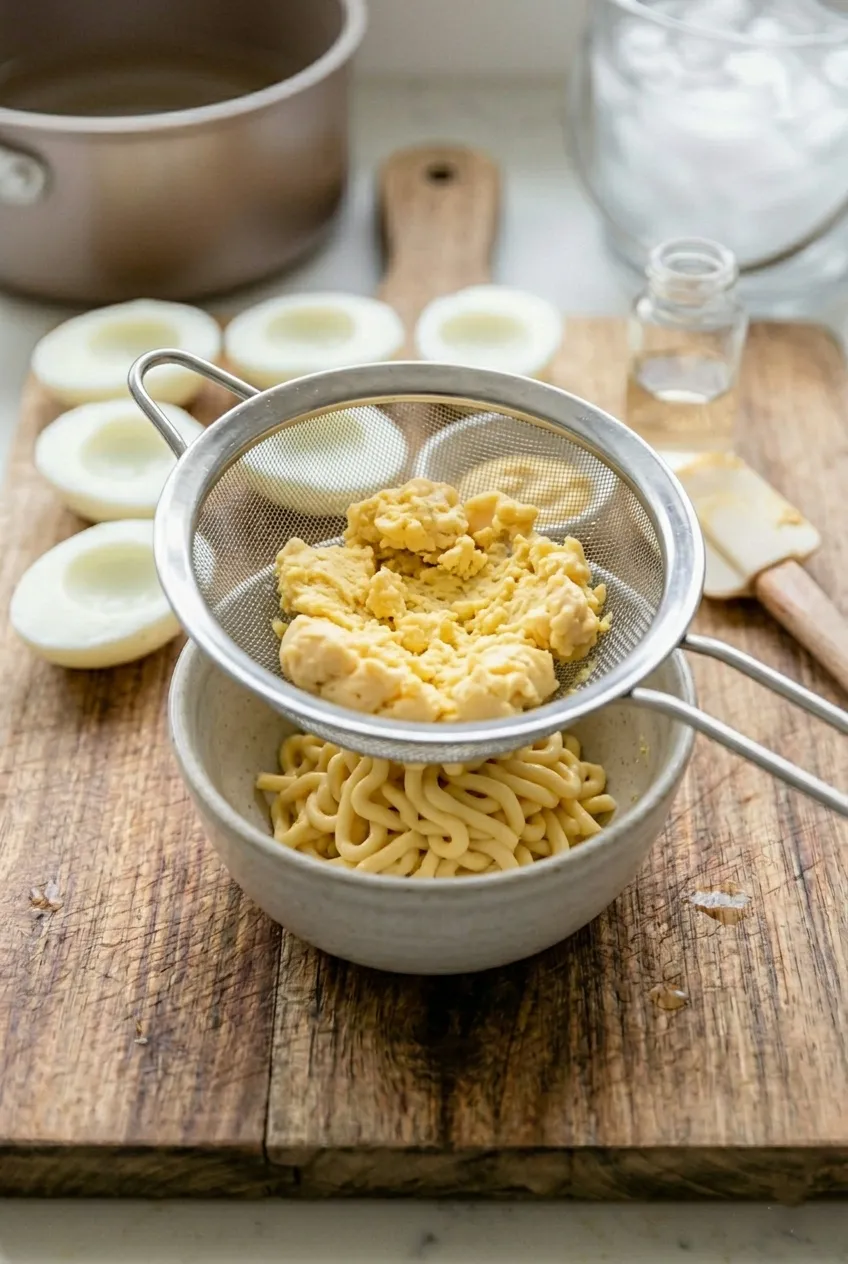
If you want ultra-creamy, fancy-looking deviled eggs, you can push the filling through a sieve.
Yes, it’s a bit fussy. Yes, it takes extra effort. But the result? Super smooth, no lumps, just silky goodness.
Do you have to do it? Nope.
If you’re just making these for yourself or your family, you can skip it and still have delicious eggs.
Step 8: Fill the Eggs
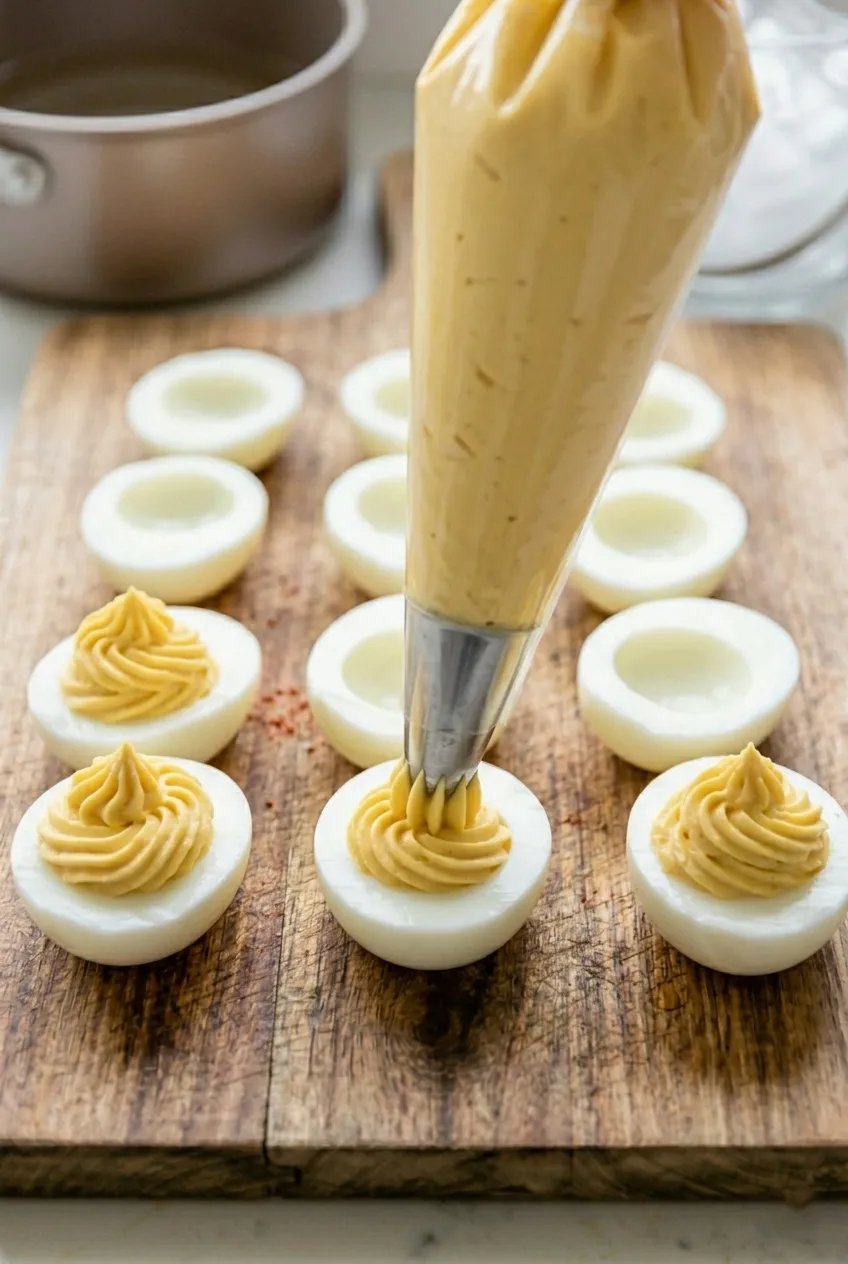
Now it’s time to put the filling back into the egg whites.
You can:
- Spoon it in (quick and easy)
- Or pipe it in (fancy and pretty)
If you’re piping, pile it on high. There’s plenty of filling, so don’t be shy.
Step 9: Garnish and Serve
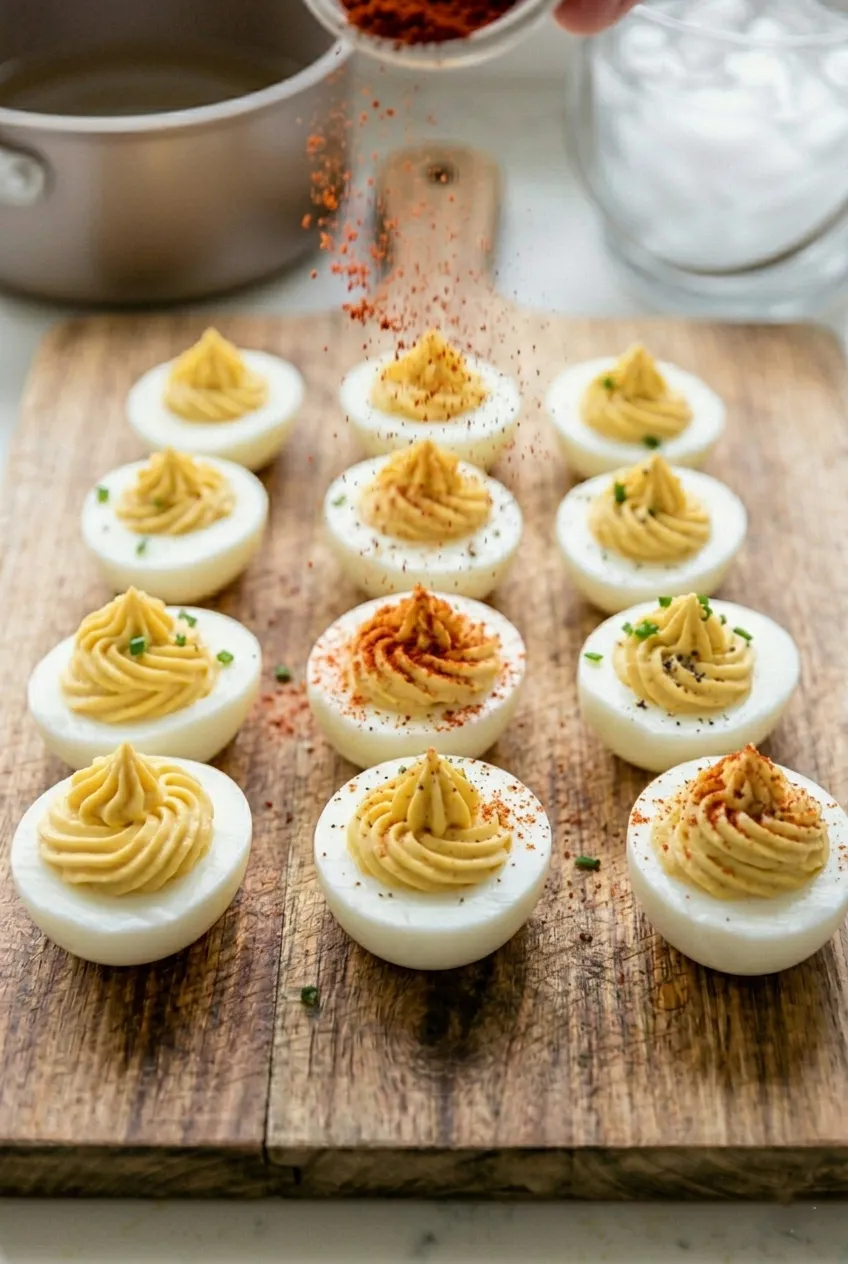
Sprinkle a little paprika on top. Add some pepper if you like.
You can also top them with:
- Chopped pickles
- Bacon bits
- Herbs
There’s really no wrong answer here.
For something hearty and budget-friendly, try this red beans rice recipe packed with flavor.
When to Eat Them
Deviled eggs are best enjoyed right after you make them.
Why? Because they disappear. Fast.
But if you somehow have leftovers, store them in an airtight container in the fridge and eat them the next day.
What Do They Taste Like?
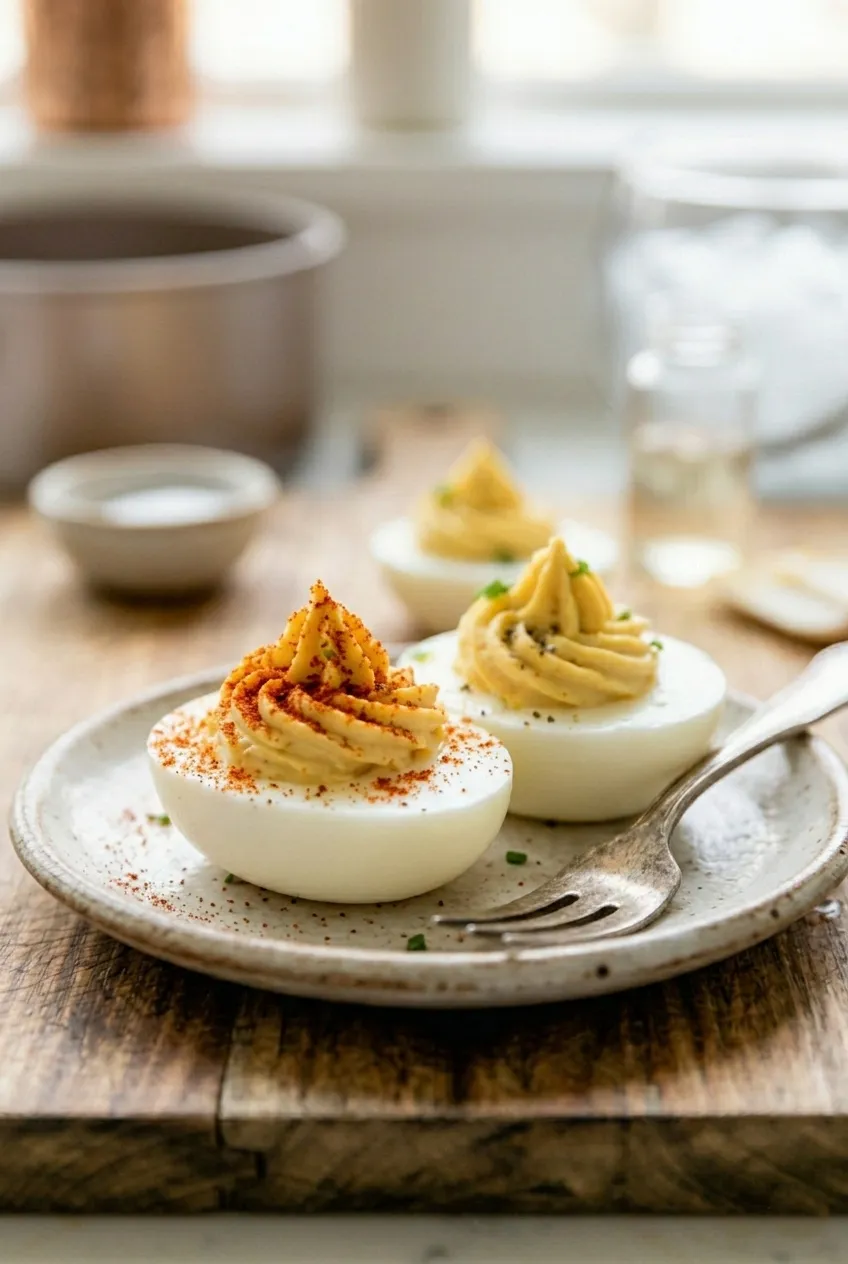
These deviled eggs are:
- Creamy
- Slightly spicy
- Tangy with a nice hit of acid
- Totally addictive
You might tell yourself you’ll just have one… but let’s be honest, that’s not happening.
Tips for Perfect Deviled Eggs
- Use older eggs for easy peeling
- Don’t overboil (7 minutes is perfect)
- Always use an ice bath
- Taste your filling before adding salt
- Keep the texture smooth for best results
FAQs
Finish your snack table on a sweet note with this best banana bread that’s soft, moist, and irresistible.
Final Thoughts
Deviled eggs are one of those recipes that never go out of style. They’ve been around since ancient times, and honestly, they’re still stealing the spotlight at every table.
They’re simple, quick, and feel a little fancy without much effort. Whether you’re making them for a party, a picnic, or just because you’re hungry… they always deliver.
So go ahead, make a batch. Just don’t expect leftovers.